How To Edit Seagate Hard Drive P-list
Seagate hard drive P-list is one of the most important modules for either Seagate hard drive refurbishing and data recovery. Before users get one Seagate patient hard drive, it’s very important for users to backup the original P-list.
The P-list is actually the module 03 and it’s also contained and can be obtained from the tracks and it has its corresponding system file as well.
To open the P-list successfully, users need to work with the right data offset.
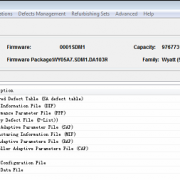
After we enter the plist editing interface, we can find:
users are able to read the plist from the source (connected hard drive), users can also import one P-list from external locations to edit.
As default data offset values, the program has offered three:
For 7200.11, the data offset is: CA00
For 7200.12, the data offset is: 19400
For 4KB structured hard drives, the data offset is: 4C800, such as the DM series, 7200.14 drives.
For other families, users need to find out the correct data offset value and fill in to open the P-list properly.
The following will show you how to find out the data offset value by yourself:
Go to winhex, find hex values: 0100 and then use F3 to search next 0100 until you find the real contents of Plist and then you get the data offset value.
In this video, the connected hdd is 5400.6 and doesn’t belong to the .11, .12 or 4kb structured series, so we need to find out the data offset value by ourselves, the data offset value is B600, let’s see.
Now let’s go back to the st program and enter the plist interface.
Now let’s see if we use one wrong data offset value and see if we can enter the interface of editing, no you cannot.
So we need to fill in the correct offset value-B600 and then we enter it.
All normal defects contained in the plist are from the selftest and users can find the defect description as SF, if not SF, it means the defects are not normal and then we can delete the abnoral defects which may cause partial sector access problem.
Right click on the defects area, users can delete current defect, delete abnormal defects, etc, it’s very easy to do so.
After you delete the abnormal defects, users need to click ok to write the new plist to the hdd. So please make sure you did everything correctly and please make sure you have created one backup of the original plist.
Any more question is welcome to sales@dolphindatalab.com.


