You can view the DFL case studies and FAQs here so that you can understand how to use the DFL data recovery tools better

To work with Dolphin DFL data recovery tools, it’s very necessary to set one target disk whenever users are trying to read from the original hard drives. DFL-DDP data recovery tool has one unique and very helpful disk imaging feature and that is to record all read operations to the target disk and all read sectors within the data drive will not be read for a second time.

So how to set a target disk smartly?

Users can image to drive: image data drive to target drive connected to DFL data recovery hardware, for example, image from SATA 0 to SATA 1, SATA 2, etc; image data drive to target drive such as external hard drives connected to pc; Image data drive to VHD/VHDX target disk.

Here Dolphin engineers strongly recommend to use VHD/VHDX as target drives. Users can connect one SATA hard drive with big capacity, such as 10TB to pc by the Universal USB to SATA adapter Pro., and then users can create multiple VHD or VHDX drives on this SATA HDD, next users can image different data drive to different VHD or VHDX drives. All these VHD(X) drives are independent from each other.

Why do we use SATA drive and the adapter, because SATA drives are much cheaper than external hard drives and the adapter helps to make the SATA drives portable easily.

Any question is welcome to [email protected] or add Dolphin Skype ID: dolphin.data.lab


It is now possible for DFL users to unlock the WD SMR HDDs firmware area on the original PCB without special firmware unlock PCBs.

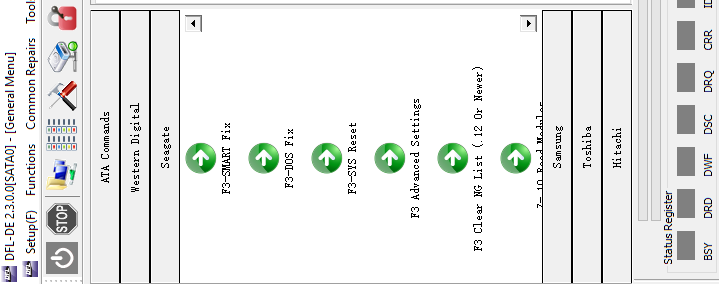
The new solution for WD SMR HDD firmware unlock is available within DFL-WD hdd repair tool and to use this solution, users need to have DFL HDD ROM chip pin reader(Many users have already had this one.) and the steps are as below:

1, Remove the original PCB from data drive;
2, Read the original ROM from original PCB by the HDD rom chip pin reader set without soldering rom chip off;
3, Generate firmware unlock ROM;
4, Write unlock rom to original PCB by the HDD rom chip pin reader set without soldering rom chip off;
5, Install the original PCB to data drive and users can see the firmware area is already unlocked successfully;
6, Users can use DFL-WD hdd repair tool to backup important firmware modules, specially the module 190, smrzone, T2data, etc;
7, Users can image the HDD or extract lost data directly if users have DFL-URE or DFL-UREP by using DFL latest T2 auto loading tech;
8, If the original PCB is physically damagaed but the Main chip and ROM chip are still good, users can use the special firmware unlock PCB and then move the original main chip to the firmware unlock SATA PCB and write original ROM to the firmware unlock PCB for disk imaging or file extraction;
9, In some cases, users need to repair the damaged firmware module 190 or repair the SMR HDD slow issue to continue for data recovery.

The WD SMR HDD firmware repair and data recovery solution is more and more complete and successful and DFL users will be able to fix more and more new data recovery cases.

Please note: the new solution supports 800066, 67, 69, 77, 11, etc but doesn’t support 810033 and 810035 which have quite different rom structure and algorithms. For WD 810033 and 810035, users still need to get the special firmware unlock PCBs for firmware unlock.

Any question is welcome to [email protected] or add Dolphin Skype ID: dolphin.data.lab
This is one patient WD SMR Charger HDD from one DFL user in China who has other data recovery tools but failed to get the lost data back due to the 190 loading issue.

HDD ID:

WD20SDRW-11VUUS0
Family: Charger
4 Heads
Microcode: 6008J
SPT: 1860

This DFL user contacted Dolphin team and bought DFL PCIe data recovery express recharge version and DFL-URE Plus and applied for remote support.

By DFL PCIe data recovery express, the user had safely backup the rom and firmware modules and tested the firmware modules and found the modules 189 and 190 are corrupted with checksum errors. At this time, the engineer had to backup the 190 by ATA but still some sectors failed to be read in module 190. The engineer repaired the module 190 by DFL-WD 190 repair solution and got new 190 and at the same time, the T2 data was extracted as one important part of 190.

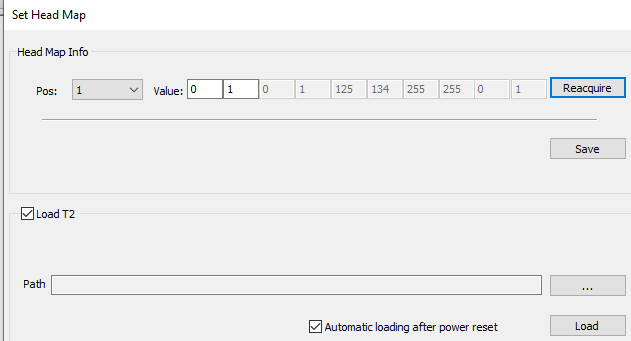
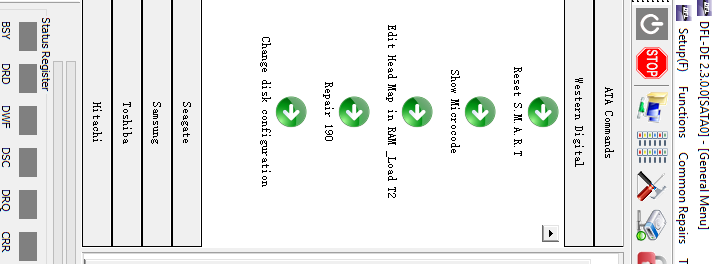
By DFL-URE Plus, the engineer could connect the Charger USB HDD directly, before loading T2Data, all sectors were found as 0, next the engineer selected the menu ‘Edit Head Map in RAM and Load T2’ and the engineer loaded the T2 data automatically.

After T2 auto loading after power reset, the engineer went to check data area again and the hex data becomes normal.

Next the engineer went to file extraction and the lost partition, folders and files were perfectly listed and finally all lost data was recovered.

Watch the video here on How to use DFL URE UREP to Recover Lost Data Easily from WD SMR HDDs Suffering All Sectors Zero:

Any question is welcome to [email protected] or add Dolphin Skype ID: dolphin.data.lab

Slow problem is very common firmware failure in western Digital hard drives, it is also the same situation for WD SMR hard drives. But please note: Slow issue can also be caused by physical weak head or weak platter surface. It’s not possible before to fix the SMR HDD slow issue by the traditional ‘slow fix’ solution.

Within the latest DFL all in one data recovery tool V2.3, users can easily fix the slow issue without affecting the data and the solution has helped many DFL users to get lost data back from the WD SMR HDDs.

The WD SMR HDD slow fix solution is available within DFL-DDP data recovery software.

All users need to do is to activate TLER, click to modify module 01 and 02 and input the read and write response time.

But if the slow issue is caused by weak heads or downgraded surfaces, users need to backup the SMRzone and module 190/T2 for running selective head image.

Any question is welcome to [email protected] or add Dolphin Skype ID: dolphin.data.lab
Here is one more successful data recovery case study for one DFL user in Italy.

HDD ID:

Model number-WD20EURX-64HYZY0
PCB: 1945
Family: DIABLO3S
SPT: 1740
4 Heads

HDD Failure Symptoms:

Wrong SN number: WDC-ROM SN#XYZ—
Capacity: 0

HDD repair tools and data recovery tools used in this case study:

DFL-WD hdd repair tool
DFL-DDP data recovery tool

HDD repair and data recovery steps are as below:

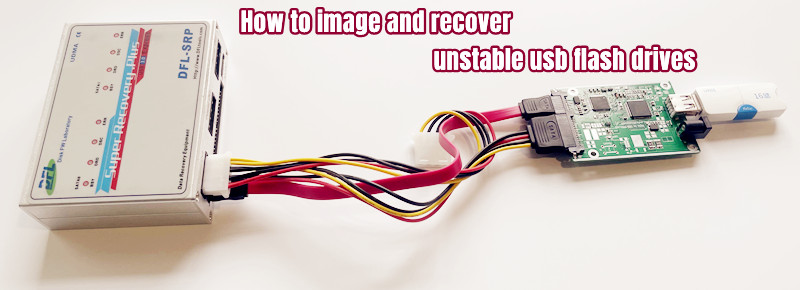
1, Connect the patient HDD to DFL-SRP data recovery hardware;
2, Open DFL-WD hdd repair software by the DFL Control Panel;
3, Enter program, get module list, backup ROM and important firmware modules;
4, Test firmware modules;
5, Common repair>Slow Fix;
6, Power off and on but the failure was not fixed;
7, Hex>LBA read>sector 0 and sector 0 was normal and ok but capacity was still 0 and the recovery was not possible;
8, This step is available in Dolphin user-only forum here;
9, Power off and on, check the data area and the data area was fully accessed;
10, Open DFL-DDP data recovery tool, set up one new data recovery project and all lost folders and files were listed and finally all lost data was recovered perfectly.

Any question is welcome to [email protected] or add Dolphin Skype ID: dolphin.data.lab

This is one PCB damaged and firmware corrupted WD5000BMVW-11AMCS4 patient hard drive and its PCB number is 771820.

This patient PCB is for one DFL user from Italy. When the user got this patient HDD, the original PCB was damaged, the ROM chip was burnt and the HDD didn’t spin up at all.

To fix this patient hdd and get the lost data back, users need to have DFL-WD hdd repair tool and DFL DDP data recovery tool and the data recovery steps are as below:

1, For these non-spinning drives, the very first step is to get the patient drives spinning again by getting one donor PCB with the same PCB number;
2, Enter DFL-WD hdd repair tool, get the module list and check the microcode from module 11 or other overlay modules;
3, This step is available in Dolphin user-only forum;
4, Enter DFL-WD hdd repair tool again(if users cannot enter program successfully, users can try to short connect tv9 and tv10), test all firmware modules and found out module 02 was corrupted, the HDD was still not detected;
5, This step is available in Dolphin user-only forum;
6, Power off and on and the patient HDD was detected perfectly;
7, Enter DFL-DDP data recovery tool, all lost data was recovered successfully.

Any question is welcome to [email protected] or add Dolphin Skype ID: dolphin.data.lab
Dolphin Data Lab has upgraded the Seagate HDD repair and data recovery solution and for all Dolphin DFL users, they can get the latest DFL Seagate hdd repair software from the user-only forum and repair and recover lost data effectively from the Seagate New ST8000NM000A 8TB B5 Cimarron family hard drives.

F3 T>^l
Cimarron.SATA.Combo.Default5xxE.MynaPlus2.1.Cust.KB1A
Product FamilyId: B5, MemberId: 01
HDA SN: WKD0ELXS, RPM: 7202, Wedges: 1A0, Heads: A, OrigHeads: C, ActiveHdMap: 03FF, Lbas: 000074795956, PreampType: 82 50
Bits/Symbol: C, Symbols/UserSector: CC9, Symbols/SystemSector: CC8 HostBlocks: 0x8, HostSectorSize: 0x200, SystemSectorSize: 0x1000
PCBA SN: 0000E03782WB, Controller: MYNAPLUS_2_0_SATA(1D20), Channel: Unknown, PowerAsic: Unknown Rev 00, BufferBytes: 10000000
SF ID: 9D 70, SF Part Size: 800, Flash Used: 3C0
Package Version: CRAEA1A06.SDN1.AB0462.SN02 , Package P/N: 100864930, Package Global ID: 00699153,
Package Build Date: 01/21/2020, Package Build Time: 13:26:54, Package CFW Version: CRAEA1A06.SDN1.AB0462.01847935.00699153.SN02 ,
Package SFW1 Version: B632, Package SFW2 Version: D632, Package SFW3 Version: —-, Package SFW4 Version: —-
Controller FW Rev: 01211326, CustomerRel: SN02, Changelist: 01847935, ProdType: CRAEA1A.SDN1QC, Date: 01/21/2020, Time: 132654, UserId: 00699153
Servo FW Rev: D632
Parallelism Identity: Single
TCG IV Version: n/a
Package BPN: 161
RAP FW Implementation Key: 22, Format Rev: 0003, Contents Rev: 01 13 C0 2F
Active BFW Container: 1
4K Sys Area: 1
TOTAL TTR = 00004F5F
Features:
– IOEDC enabled
– IOECC enabled
– DERP enabled v. 7.0.00.0000000000000000
– LTTC-UDR2 compiled off
– SuperParity 2.5 enabled
– Humidity Sensor enabled
– Media Cache Partition enabled
– Torn Write Protection enabled
– SweepSeek 2.0
– SubRelease:0
– Critical Event Log v. 1
– FAFH 42.4 enabled
– EWP:1
– DRAM Mirror:1
– MiniZones Serpentine Media Layout

By the DFL Seagate HDD repair tool, users can easily unlock the firmware area, backup the important firmware modules, fix the damaged firmware modules and then recover the lost data with DFL DDP data recovery hardware tools.

Any question is welcome to [email protected] or add Dolphin Skype ID: dolphin.data.lab
How to Repair ST4000NM0053 Hard Disk not Detected-Seagate Constellation ES.3 SED?
How to recover data from ST4000NM0053 hard disk which is not working?
How to Recover Data from a Hard Drive that Won’t Boot?

When trying to get the data off the patient drives, it’s always necessary to treat the patient carefully and correctly. Users must understand the failure of the patient drive and use the right hdd repair and data recovery solutions.

This article is to introduce the steps on how to repair firmware failure and get lost data from Seagate ST4000NM0053 Constellation ES.3 SED drive.

Failure Symptoms:

Not detected
Firmware Locked>The module list is empty
Cannot enter F3 T>

HDD repair and recovery steps:

HDD repair tool used: DFL Seagate HDD Repair Tool for fixing ST4000NM0053 Constellation ES.3 SED drive

Backup ROM;
Generate unlock rom;
Write unlock rom;
Power off and on HDD;
send unlock key

CTRL+Z to enter F3 T>

Exit program

Re-enter program

Module list is available

Try to backup firmware modules or execute commands but failed

Next

HDD busy and power restart auto

Click stop and then power off and on

Send unlock key

Common Functions>Common Repair>Unlock Diag Mode

Log window shows: Operation Success

Try to backup important SYS files again and log window shows success

Next users can enter F3 T> and start firmware repair

After firmware repair, users can enter use DFL-DDP data recovery tool to extract the lost file directly or image the patient HDD.

Any question is welcome to [email protected] or add Dolphin Skype ID: dolphin.data.lab
This DaHua DVR data recovery case study was for one DFL user from India. This is one formatted Dahua DVR hdd and the Indian user has used other CCTV DVR data recovery tools to scan the patient DVR hdd but get nothing or get videos with only 2MB, they are just some small video fragmented files.

When the user received this DVR patient HDD, the DVR brand is unknown. No one told the users about the DVR brand and then the user contacted Dolphin team for remote technique support.

Dolphin engineer checked the hex data of the DVR patient HDD and analyzed the data carefully and found out the dvr brand is DaHua DVR.

The patient DVR hdd was formatted and the file system info was overwritten and for this kind of DaHua DVR video recovery cases, users need to select ‘Deep Analysis’ within the Dolphin DVR recovery software and start the video fragments analysis, collection and restruction and finally all lost videos will be listed properly.

With the help of Dolphin engineers, the Indian client had got all his lost videos back.

Any question is welcome to [email protected] or add Dolphin Skype iD: dolphin.data.lab

Western Digital SMR HDD firmware repair and data recovery cases are more and more common for data recovery engineers worldwide.

Among all cases, the most common cases are the following two types:

1, Firmware module 190 failure;
2, Physical head damage.

As for module 190 failure, it has the following situations:

Module 190 is good but couldn’t be loaded to ram properly;
Module 190 is corruped due to bad sectors within the module LBA range or overlap nodes or vacant nodes or error nodes generated;

As for Physical head damage, users need to swap heads to continue and can try head and platter swap tools here.

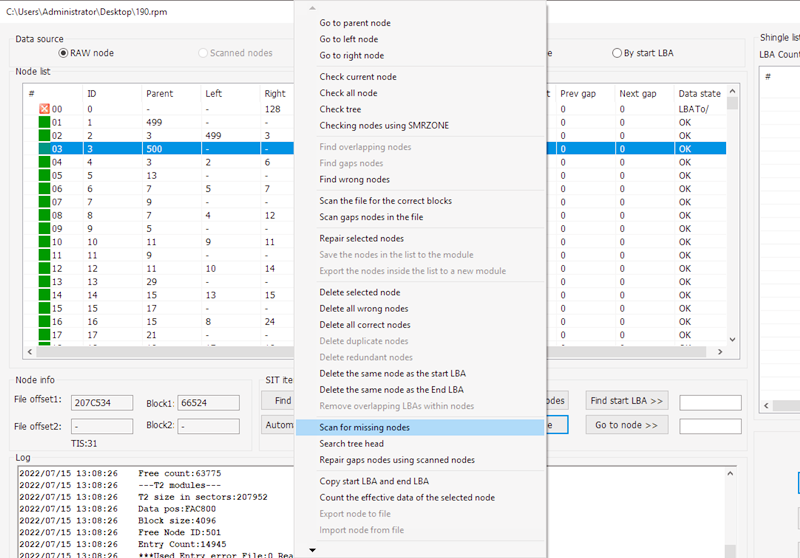
To ensure users can get the best WD SMR hdd data recovery success rate, Dolphin team have added the unique WD SMR HDD Firmware module 190 manager with the following detailed functions:

Import Module 190 and Manage
Extract the T2 Data(190 core nodes)
Original Nodes List
Scanned Nodes List
List Nodes by Original Order
List Nodes by Node Tree
List Nodes by Start LBA
SIT Repair
Search Correct Blocks Auto
Search and Replace
Search Error Nodes
Search Overlap Nodes
TIS Check
Vacant Nodes Count
Overlap Nodes Count
Tree Root Node Number Check
Test Current Nodes
Test All Nodes
Test Tree
Test Nodes by SMRZONE
Scan Lost Nodes
Repair Selected Nodes
Delete Selected Nodes
Delete Error Nodes
Delete Nodes with Same Start LBA
Delete Nodes with Same END LBA
Repair Vacant Nodes with Scanned Nodes
Caculate Valid Data from Selected Nodes
Zerofill Bad Sectors within The Module
Load 190/T2 auto for data recovery

Users can get above solutions within DFL-DDP data recovery tool.

Any question is welcome to [email protected] or add Dolphin Skype ID: dolphin.data.lab