You can view the DFL case studies and FAQs here so that you can understand how to use the DFL data recovery tools better

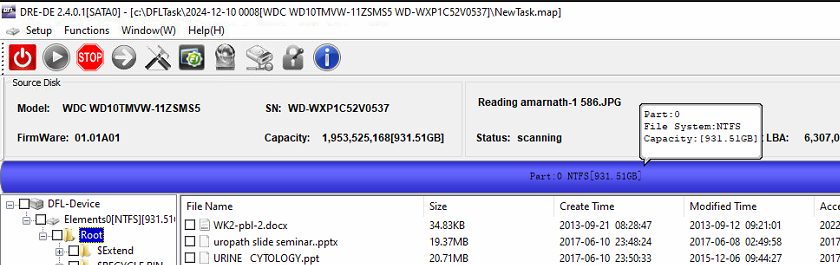
This is one typical western digital SMR hdd firmware repair and data recovery case study, the patient drive was busy, the firmware area and data area was not accessed, the patient HDD ID was not detected.

To recover the lost data from above busy WD SMR hdd, users need to have the following tools:

01: DFL DDP data recovery equipment;
02: DFL WD hdd firmware repair tool

HDD firmware repair and data recovery steps:

01: Get WD SMR busy hdd ready;
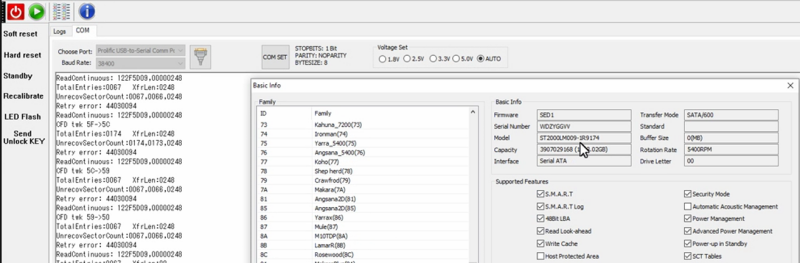
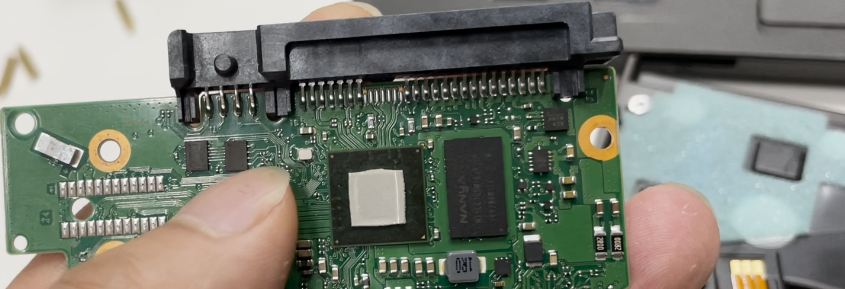
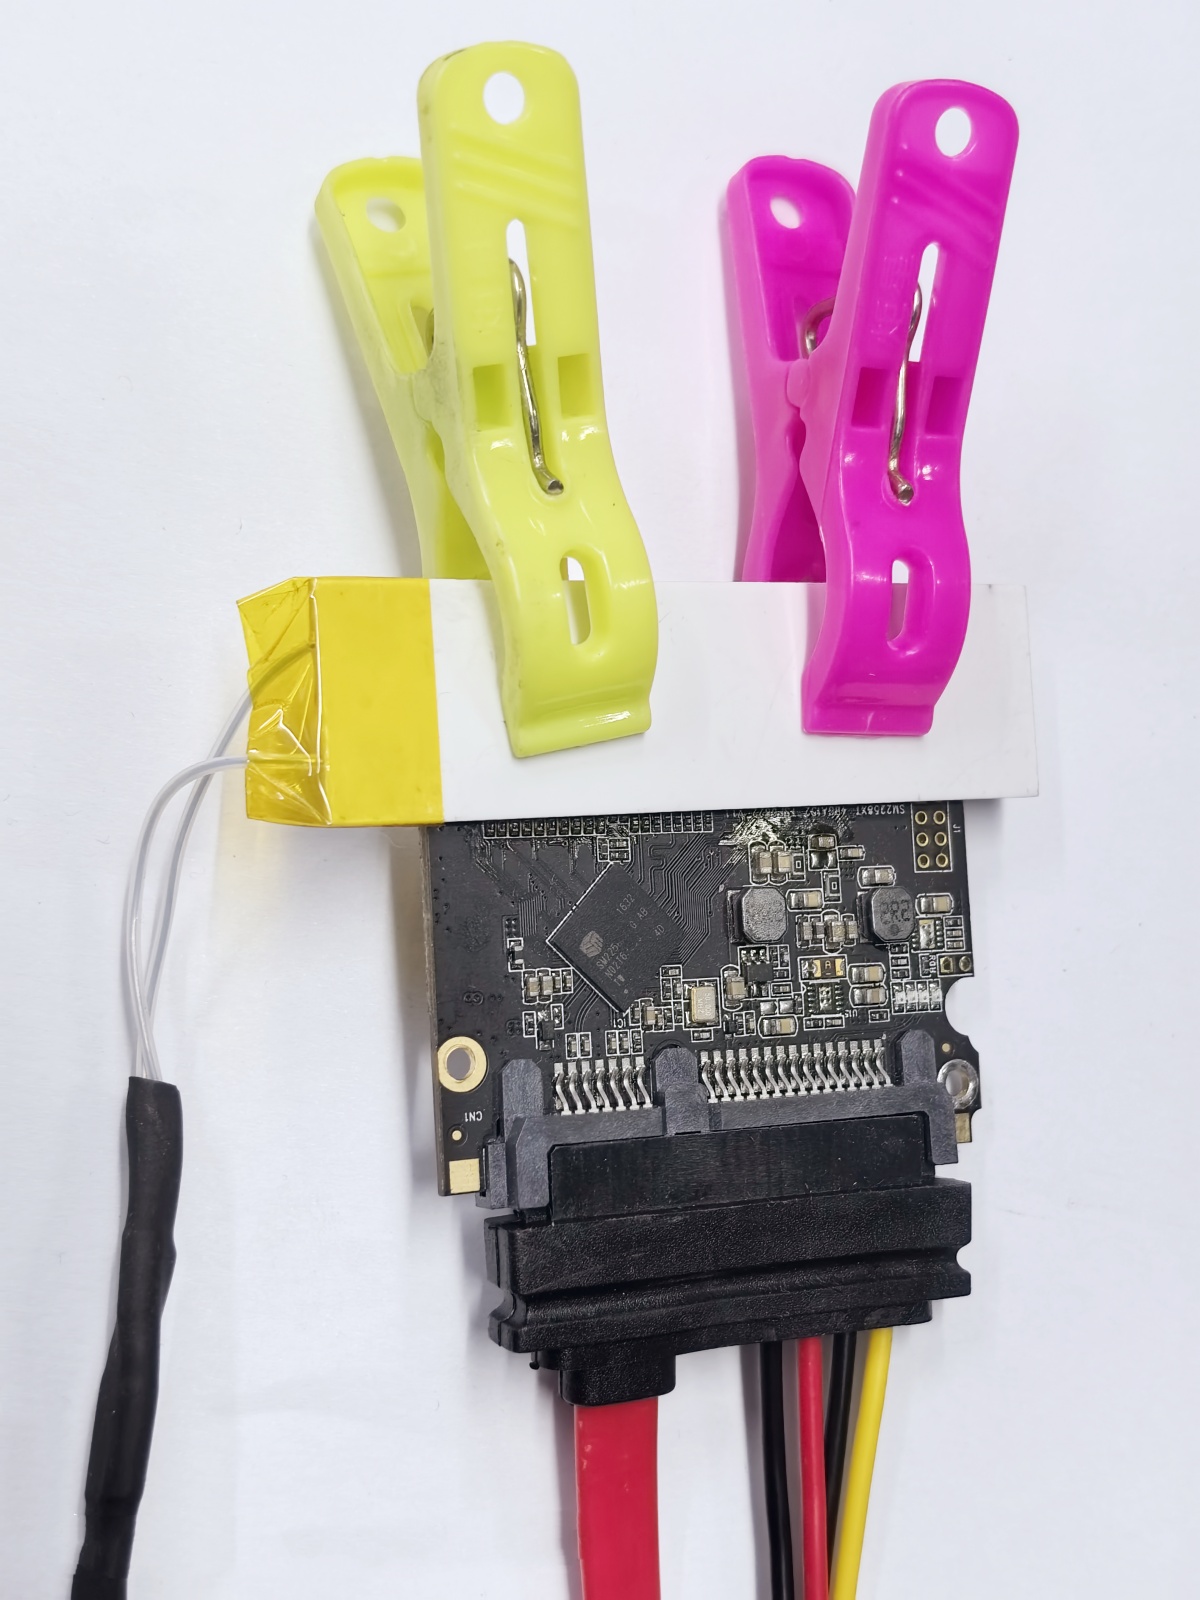
02: Read patient HDD ROM by HDD rom chip pin reader;
03: Generate unlock rom by DFL WD hdd repair tool and write unlock rom by pin reader (sometimes users need to use firmware unlock PCBs to unlock firmware area);
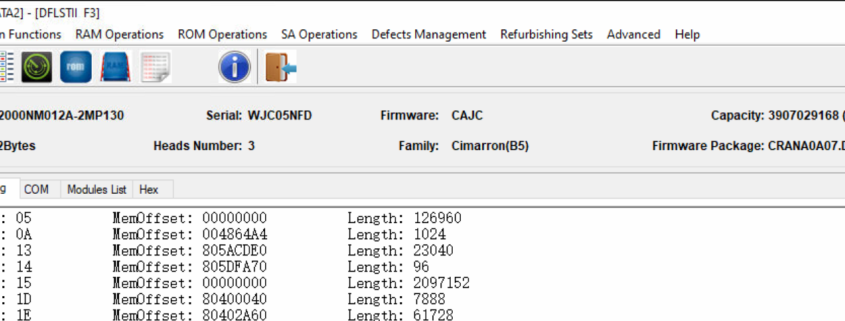
04: Backup important firmware modules;
05: Test firmware modules;
06: Repair module 190 and get repaired t2data file;
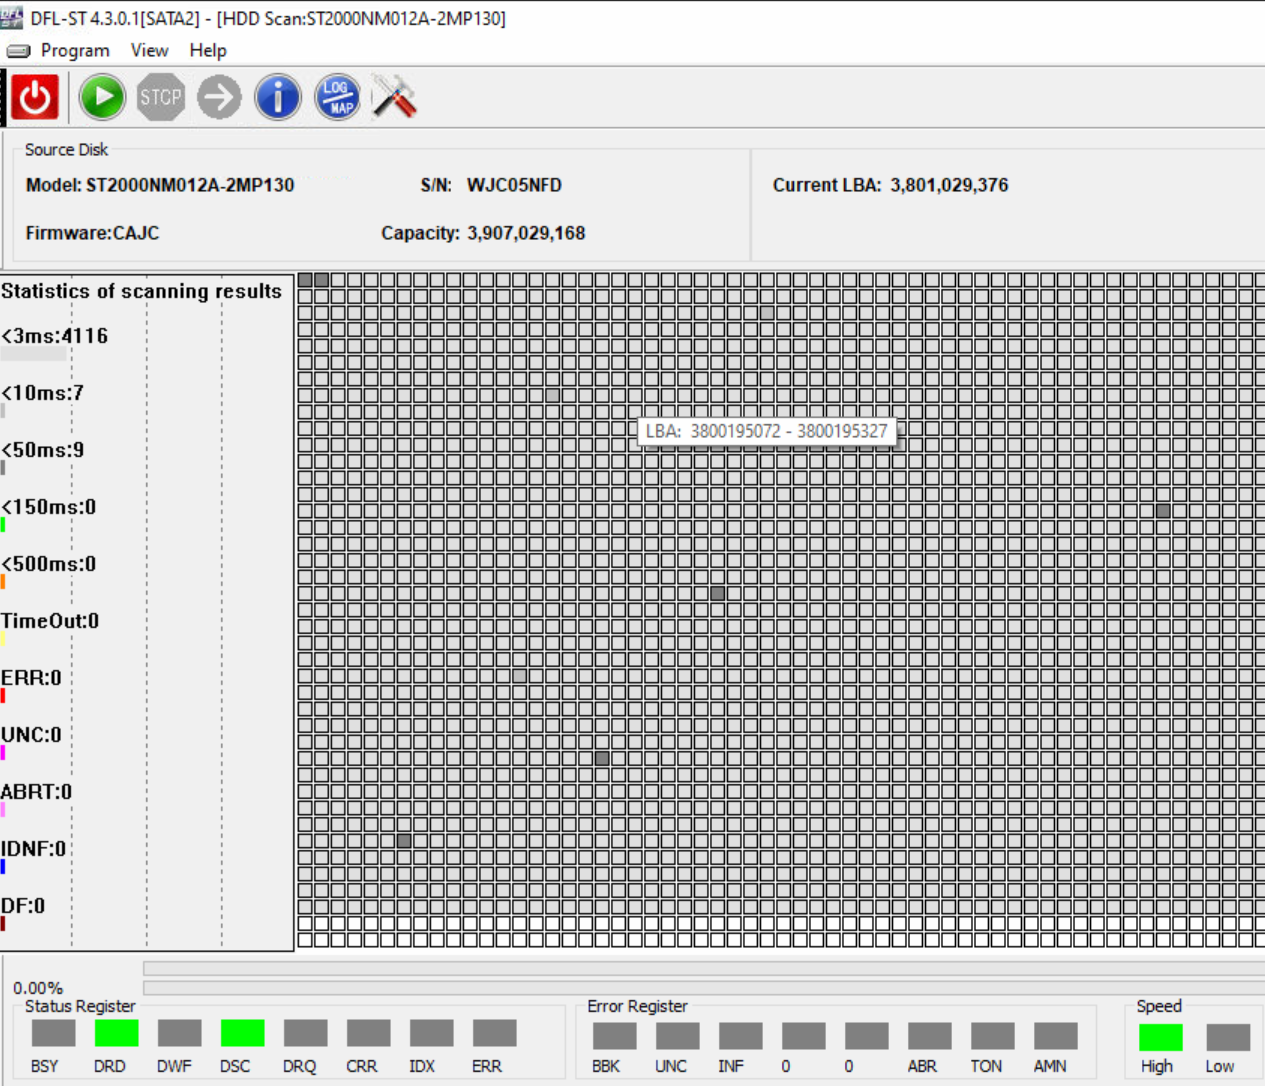
07: Load T2data to ram and set auto t2data loading to ram within disk image settings;
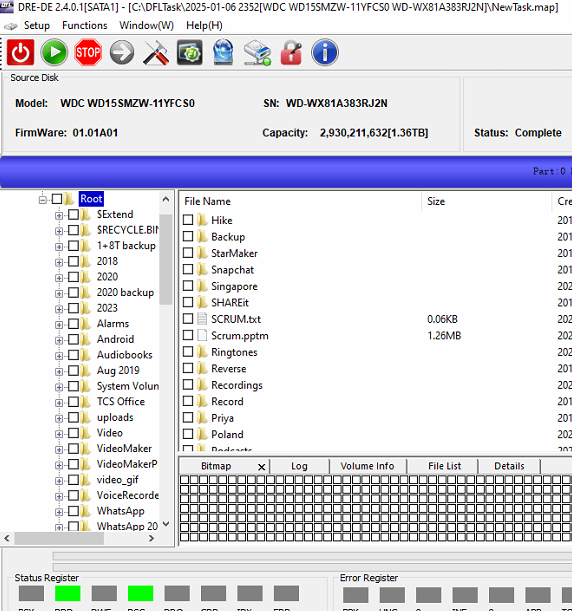
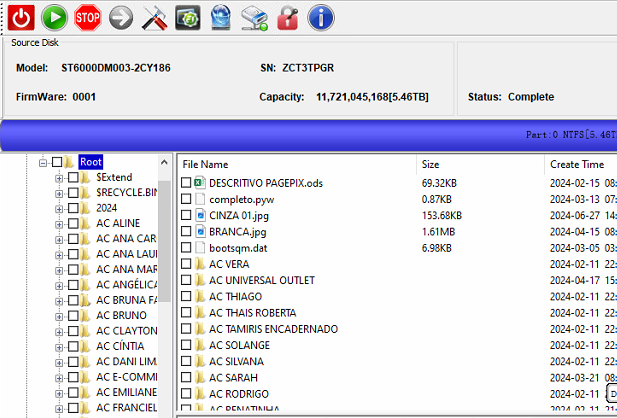
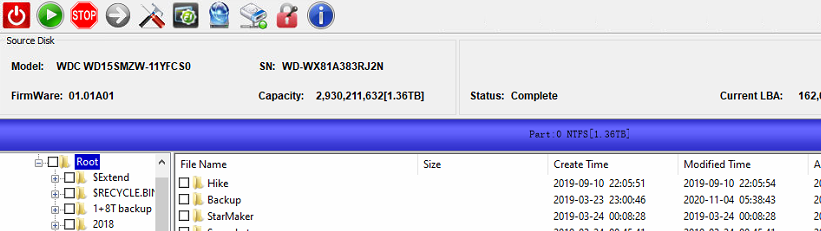
08: Data area was accessible and all lost data was recovered successfully.

Any question is welcome to sales[at]dolphindatalab.com.

This is one Seagate ST2000NM012A-2MP130 hard drive firmware repair and data recovery case study from one Dolphin user in Colombia. The user failed to fix this case by other data recovery tools and then applied for remote support from Dolphin engineers.

Patient HDD iD:

ST2000NM012A-2MP130
Family: B5 Cimarron

Patient HDD Symptoms

HDD detected but all sectors are not accessible

HDD Repair and Data Recovery Steps

01: Seagate hdd rom backup and unlock rom generation by DFL seagate hdd repair software;
02: Write unlock rom, power off and on, send unlock key to unlock firmware area;
03: Backup important SYS files;
04: Remove password-2;
05: Repair module 40;
06: Write back original ROM;
07: Open DFL-DDP data recovery software and all lost partitions and folders are available for immediate data recovery.

Any question is welcome to sales[@]dolphindatalab.com or add Dolphin skype ID: dolphin.data.lab

This is one Western Digital SMR patient HDD-WD40EZAX with DWF error and this case study is to explain how to fix the DWF error and get the lost data back.

When this patient drive was received, it’s not possible to access the data area, whenever trying to access the data area, the user got the DWF error.

The following steps are very important and basic to do before firmware repair:

01: Backup rom with pin reader;
02: Generate unlock rom by DFL-WD firmware repair tool;
03: Write unlock rom by pin reader

Next by DFL-WD, users can:

04: Disable 411
05: Backup module 190 and 02 and other important firmware modules;
06: Test firmware modules and find out which modules are damaged

Next users can

07: Repair damaged 02 and 190;
08: Write new 02 and 190;
09: Enable 411 and restart firmware;
10: Open DFL-DDP data recovery tool and all lost partitions, folders and files are recovered.

Any question is welcome to [email protected] or add Dolphin Skype ID: dolphin.data.lab

This is one very interesting Seagate ST2000LM009 hdd firmware repair and data recovery case study.

When power on the patient hdd, users get continuous error messages:

TotalEntries:0067 XfrLen:0248
UnrecovSectorCount:0067,0066,0248
Retry error:44030094
ReadContinuous: 122F5D09,00000248
CFD twk 59->50

Users cannot enter F3 T> easily.

Here is the video data recovery case study with details on how to fix above COM terminal errors and recover the lost data.


This is one successful Western Digital HDD data recovery case study for one Dolphin user from Colombia.

Patient HDD ID:

Model number-WD15SMZW-11YFCS0
PCB: 2060-800067-001

Patient HDD Failure Symptoms:

Undetected
Data not accessed

HDD Repair and Data Recovery Steps:

01: Read ROM by HDD ROM chip pin reader;
02: Generate unlock ROM by DFL WD HDD repair tool;
03: Write unlock rom by HDD ROM chip pin reader;
04: Convert the 800067 USB interface to SATA by WD 800067 USB-SATA Adapter Smart;
05: Connect patient HDD to DFL WD HDD repair hardware;
06: Backup ROM and disable 411;
07: Firmware restart and re-enter software and backup 190;
08: Repair 190 and write repaired 190;
09: Run WD SMR slow fix;
10: Enter DFL DDP data recovery software and load repaired T2data and all lost data was accessed successfully.

Any question is welcome to sales[at]dolphindatalab.com or add Dolphin skype ID: dolphin.data.lab

To read and write ROM from Seagate HDDs with mini ROM chips, users have two methods by Dolphin data recovery solutions.

One method is to solder the mini rom chips off and put them to the mini rom chip sockets to read and write. Now Dolphin Data Lab offers another method to read and write rom without soldering the mini rom chips off for Seagate 100871827 HDDs with two 4*3 mini rom chips.

Users can watch the video of new Seagate 100871827 HDDs’ rom read and write without soldering here

Any question is welcome to sales【at】dolphindatalab.com or add Dolphin Skype ID: dolphin.data.lab

This is one Seagate undetected ST6000DM003 hdd data recovery case study for one Dolphin user in Brazil.

Patient hdd ID:
Model number-ST6000DM003-2CY186

Failure Symptoms:
Undetected
Data area is not accessed

HDD Repair Tools and Data Recovery Tools used:
DFL-Seagate HDD Repair Tool
DFL-DDP data recovery equipment

HDD Repair and Data Recovery Steps:

01: Connect patient hdd to DFL seagate firmware repair hardware and enter the Seagate HDD firmware repair software;
02: Backup the rom, generate unlock rom, write unlock rom, power off and on, send unlock key;
03: Backup important SYS files;
04: Fix the media cache issue;
05: Clear glist, smart and regenerate translator;
06: Enter DFL-DDP data recovery software to list all the lost partitions and folders to recover directly.

This is one second-hand WD HDD data recovery case from one Indian Dolphin user. The patient HDD was operated by one non-Dolphin data recovery service supplier but failed and then the patient hdd owner brought the hdd to our Dolphin user in India.

Patient HDD ID

WD10TMVW-11ZSMS5
Family: Helios
PCB: 1814

Failure Symptoms:
original rom lost/corrupted
HDD was not detected

HDD Firmware Repair and Data Recovery Steps

01: Found donor firmware modules and rom with very close or same microcode;
02: Connect patient HDD and enter DFL-WD firmware repair software;
03: Write donor ROM, power off and on;
04: Load ATA auto from donor firmware directory;
05: Backup original firmware modules;
06: Load module dir and load dir to ram;
07: Write donor modules, firmware restart and enter software;
08: Write original data modules, power off and on;
09: Enter DFL-DDP data recovery software to extract lost data easily.

Any question is welcome to sales[at]dolphindatalab.com or add Dolphin Skype ID: dolphin.data.lab

In some ssd data recovery cases or flash drive data recovery cases, the chips may get downgraded and the drives become very slow, running with many bad sectors and sometimes even not detected. After users heat the chips properly with suitable working temperature, the patient SSDs or flash drives can become faster or even detected and impossible cases become possible!

Flash Heating Power Supply Pro. is available worldwide by DHL, EMS, Fedex, etc and it is specially designed for a higher success rate of SSD data recovery and other flash drive data recovery.

Flash Heating Power Supply Pro. is to increase the working temperature of SSD and other flash drives by heating the chips on the flash drives with one adjustable switch knob. With the knob, users can adjust the voltages to control the working temperatures.

Normal voltages: 19v-24v
Normal temperatures: 60℃-100℃

The patient HDD-Seagate Rosewood ST2000LM007 has suffered severe LED error in the COM terminal, users cannot enter F3 T> and cannot continue the hdd firmware repair and data recovery.

To fix the LED error, there’s one very helpful rom function-‘Disable Subsystem’.
Function path: DFL Seagate HDD repair tool>ROM Operations>ROM Edit>Disable Subsystem

Before using the function, users need to import the unlock ROMO, After using the function, users can save the new rom and write the new ROM, power off and on, users can easily enter F3 T>

Next users can backup the important firmware modules and start the firmware repair. There’re many one click quick solutions available under the Common Menu.

After the firmware repair, users can use DFL-DDP data recovery software to extract lost data easily.